Feeds:
Posts
Comments

Archive for the ‘Decorating’ Category

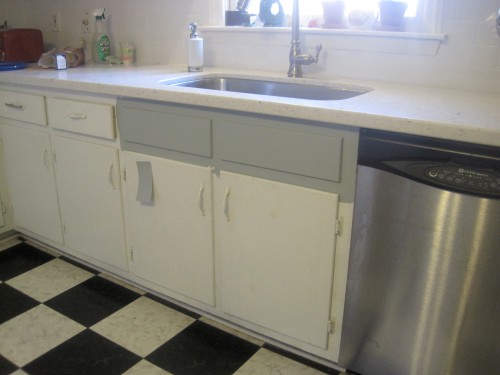
It’s time to paint the kitchen cabinets. We bought a new countertop and backsplash, both of which look great. We also installed new under cabinet lights, but I’m not so happy with those. Now we’re talking paint colors. Here’s a photo of our very white kitchen.

I happen to love white kitchens and would be happy repainting the cabinets white, but Mark is really keen on adding color. So we decided to compromise: we’d repaint the upper cabinets white and the lower cabinets some other color. Inspired by photos of these gray cabinets I found here, I tried to sell Mark on the idea of gray cabinets. His response to the photos: “very pretty, but cold and institutional.” Hmm. After much discussion, we settled on searching for a blue-gray color which would add some color but still be fairly neutral, go with the countertops, and feel warm and inviting. That’s when we brought home every blue-gray paint swatch known to man and started taping them on our cabinets (you can see just a few of them of them in the photo above).

Over and over our eyes was drawn to “Winter’s Day” by Martha Stewart. Not wanting to repeat the mistakes I made searching for a porch ceiling color (which you can read about here and here), I tried to do some research on “Winter’s Day,” googling to see if I could find photos of it on other people’s cabinets. No luck. So we made a $3 investment and bought a test can which I used to paint a portion of the bottom cabinets.

Pardon the less-than-stellar photos. I’m not a great photographer on my best day, but I really don’t know how to take photos when dealing with light from a window.

Sadly, we don’t love Winter’s Day. We like it, but we’re going for love here, not simple affection. So it looks like we’re back to the negotiation phase of searching for a paint color.

It’s probably a good thing that we decided not to go with Winter’s Day because it has a rather unfortunate side-effect. “A winter’s day” is the opening line to the famous Simon and Garfunkel song, “I am a Rock.” If you’re not familiar with that tune, it builds to the following lines which every time I look at Winter’s Day I can’t help but sing at full volume: “I have no need for friendship; friendship causes pain. It’s laughter and it’s loving I disdain. I am a rock. I am an island.”

Yeah, thank God we’re picking a new color.

Read Full Post »

The first year Mark and I lived in this house we planted a Japanese maple (Acer palmatum ‘Bloodgood’) on our wedding anniversary. We spent over $100 on that tree, but it’s been worth every penny. It’s gorgeous and has grown tremendously in the past six years (you can see a photo of it on this previous post). It also remains Mark’s hands-down favorite thing we’ve planted in the yard. Last summer he said to me, “No matter what is going on in my life, when I look at that tree I can’t help but be happy.” Now Mark is not a tree-huggin’, nature-lovin’ kinda guy, so that statement was pretty darn powerful. In fact, it planted the seed (ah, clever pun) for his Valentine’s Day gift this year.

The Japanese maple is stunning in the fall; its leaves turn a deep crimson. So when the leaves started changing last October, I began plucking some leaves off the tree and tucking them in a thick book. I collected leaves over a few weeks to make sure I had some representing the peak of fall color. Then I just left the leaves alone (or, I “leaved” them alone — I just can’t stop the puns today!) in the book to dry out.

For Valentine’s Day I gathered all the leaves I had tucked away in the book.

Then I grabbed a frame we already had.

I picked my two favorite leaves, arranged them on the glass, cut some pale green card stock to serve as the background, and put a piece of cardboard behind that so that the leaves were pushed snug against the glass (I didn’t want them slipping).

Mark was really touched by the gift. He even put the frame on the bookcase right next to his most beloved collection of Michael Chabon novels and his Edgar Allen Poe action figure. I feel so honored.

Read Full Post »

The $5000 dishwasher

It’s time for me to come clean. I’ve been putting off this day long enough. I have done something decidedly un-yikes-money-ish. I have started to upgrade my kitchen with money that would probably definitely be better suited to a long stay in my savings account.

It all started just over a year ago when my sister called me out of the blue and said she wanted to give us a dishwasher. Our old dishwasher was, as she put it, disgusting. So she bought us this fancy dishwasher that is gorgeous (oh yeah, it washes dishes pretty well too).
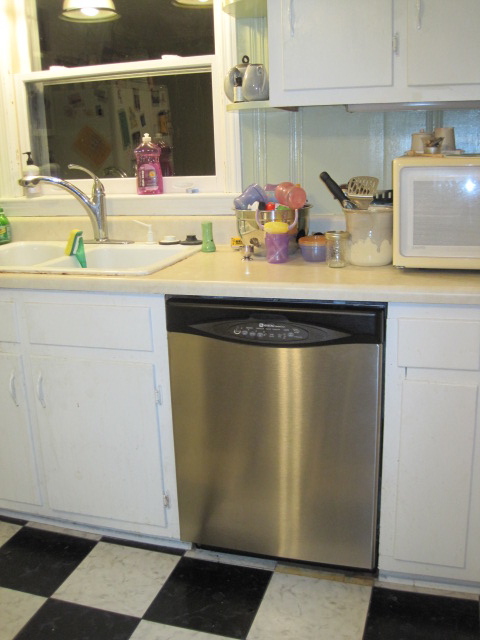
The dishwasher came with one problem: it made the rest of our kitchen look like crap. It’s not that the kitchen wasn’t dingy before the dishwasher came along, it’s just that when everything in a room is dated and dingy your eye kind of just gets used to it. But that beauty of a dishwasher made the rest of the room an eyesore. Now, don’t get me wrong, since the moment we bought this house I’ve been dreaming of updating the kitchen. I’ve given it a lot of thought. A lot. If only I were paid to spend time online looking at pictures of other people’s kitchens. Could that be a job because I’m really, really good at it?

Anyhow, not long after we got the oh-so-fancy new dishwasher, my parents bought us the arguably even fancier new kitchen range.

With two new appliances and one long-time unhappy cook, this kitchen was practically begging for a facelift. So I started dreaming about upgrades. Here are some photos to get you acquainted with what I was working with:

I know, some of these pictures are from before we even got the new stove. They’re the really “before” pictures.

That light above the kitchen sink -- it hasn't worked in MONTHS.

And this is the view from when I’m cooking at the stove (except now I have the fancy new stove):

While I fantasized about gutting the kitchen and doing a complete remodel, that costs big, big bucks and let’s face it, I wanted to spend small, small bucks. So I figured the biggest bang for our bucks would be to replace the countertops, sink and faucet. The counters were laminate and badly scratched and stained. The sink, however, was really disgusting — it was rusting through on the edges (which you can sort of see if you scroll up a few pictures — look at the left side of the sink edge. Yuck, right?).

I did a lot of research on different countertop options, and even more shopping around comparing prices. In the end, we decided on quartz countertops for their durability and style, and chose a stone called Bianco River by Silestone. It’s a white countertop with pale gray mottling. I’ve always loved the look of marble countertops but don’t like that they stain fairly easily. I needed something that would withstand anything I (or Charlie) could throw at it. So I waited for a sale at Home Depot (I noticed that they offer the same sale every 3-6 months) and ordered the countertops. I really wanted to buy the countertops from a local kitchen design store rather than a big box store, but, sadly, they couldn’t compete with the sale price at Home Depot and I couldn’t justify the additional expense. After I ordered the counters, they still weren’t installed for about a month. First someone had to come out to the house to measure the space and then they had to go away to order and cut the stone.

Eventually the counters arrived and were installed in just a few hours. Here’s a not so great photo taken immediately after the countertops and sink were put in:

Do you see that brand new sink? Yowsa!

Our previous sink was a double bowl, drop in sink. This new sink, as you can see, is a big, deep single bowl and I love it. LOVE IT. I can put huge pots and pans in there, step back, and they’re completely hidden from sight. It’s like magic. We also got that new faucet which is great, but it can’t compete with the love affair I’m having with the sink.

The only problem with getting the new countertop is that it sort of necessitated getting a new backsplash. And I believe, folks, this is what is commonly referred to as a slippery slope. You see, the old countertop had a six-inch backsplash and when it was removed along with the old counters, it left behind a very ugly stripe:
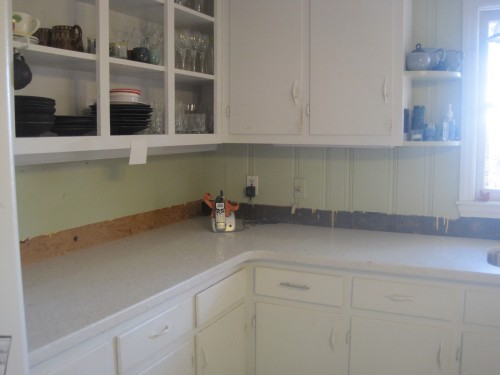
While the rest of the wood panelling is just painted, we couldn’t paint over the brown stripe because it was full of old, dried glue that couldn’t be removed.

So next up for our kitchen update: a new backsplash. I figure that by the time we’ve finished all our little kitchen upgrades (which include many more items beyond a backsplash), we’ll have spent about $5000. And that’s how one “free” dishwasher is gonna end up costing some mighty big bucks. But I promise, from now on I’ll share our kitchen makeover journey along the way.

Are any of you dreaming of renovating your kitchen? Or perhaps you’ve already created your dream kitchen? What features are you happiest with and what would you change in a heartbeat? Do tell!

Read Full Post »

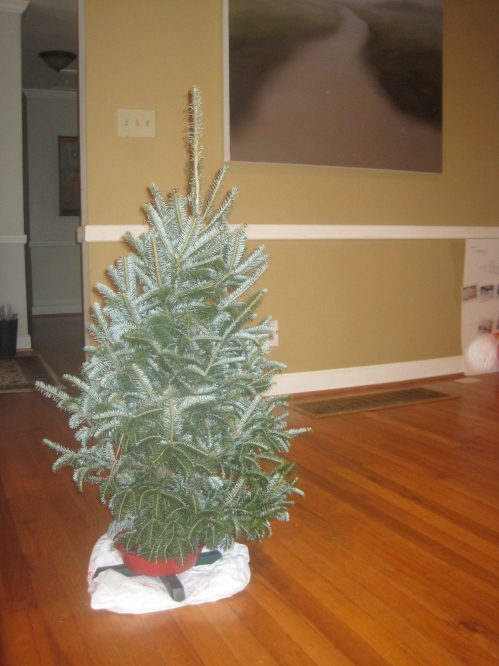
So it turns out that Charlie is a cheap date. I promised him last Friday night that on Saturday we’d go get a Christmas tree. In a strange moment of Christmas giving, I even went so far as to tell him that he could pick whichever tree he wanted. I regretted the promise as soon as it left my mouth, suddenly wondering just how expensive Christmas trees could get. But ultimately I told myself that letting Charlie pick the Christmas tree was alright because I’d be helping him create wonderful Christmas memories (which pretty much must be how every parent justifies spending too much on their kid for Christmas). Luckily for me, it turned out that Charlie wanted a small tree so that he’d be able to reach the top in order to “put the angel on.” Where does he get this stuff? Mark and I (and our total lack of enthusiasm about Christmas decorating) have never talked to him about Christmas trees and angels and stockings. None of it. Anyhow, first thing Saturday morning Charlie had us in the car heading to the nearest Christmas tree lot. When we arrived, he hopped out and ran straight toward this tree that is so small that it was placed on top of a picnic table rather than with the rest of the adult trees:

This baby put us back $25 which is a drop in the bucket compared to the much larger trees. And since it’s so small, we already had all the ornaments it took to decorate it. All we needed was a new set of lights because our old set didn’t work when we plugged it in. But, I managed to score a great deal on two light sets at CVS; not only were they on sale, but the Extra Care Bucks reward machine printed out a coupon when I scanned my card, and CVS was offering an additional $3 off LED lights when you bring in an old set for recycling. These LED lights even come with a 3-year warranty, although somehow I can’t imagine that I’ll be organized/inspired enough to hold on to the original receipt and bar code from the box in order to take advantage of the warranty should the lights break.

So even though Charlie’s Christmas tree might just have qualified as the tiniest tree at the lot, I think we managed to make it look special nonetheless. The important thing, of course, is that he loves it.

And, yes, Charlie did put the angel on top himself (not before dropping it on the ground and breaking its wing though). Nothing says Christmas more than a teary four-year-old standing over a crumpled angel. Fortunately, glue was made just for this kind of occasion.

Read Full Post »

Neither Mark nor I are too enthusiastic about decorating for Christmas. We never have been. While I appreciate a beautifully decorated home in someone else’s house, I can’t help but feel like decorating in my own home is sort of a hassle. Consequently, we’ve never bothered to be well-equipped to deck the halls. But this is the first year that Charlie is aware of and seems to understand Christmas (at least the decorating/Santa/presents part). So he’s been asking about how we’re going to get ready for Christmas.

Since I’m all about using what you have and doing things for less dollars, I was thrilled to stumble upon this idea for making a holiday garland out of pine cones. And since you know our front yard is chock full of pine trees, we have plenty of pine cones to use as decorations. You can find the full directions for the pine cone garland here, but the concept is simple: screw small cup holders into the bottom of each pine cone, punch small holes in a long ribbon, and hang a pine cone from each hole.

This was a great activity to do with Charlie. Charlie collected a huge number of pine cones from the front yard, sorted them by size and quality (no inferior pine cones were going to grace our garland!), then he helped hang each pine cone in a hole in the ribbon.

Coupled with other items we already had such as stockings (including a beautiful embroidered one for Charlie made by my very talented mom), ornaments in a vase, a cool red star made by my artistic sister-in-law, and some candles, this pine cone garland makes our fireplace look downright festive.

All told, our decorated fireplace cost just a few bucks for the small cup holders for the pine cones. Not bad at all.

And for the next family decorating project, I think we’ll try homemade paper snowflakes which in addition to being pretty and oh so inexpensive, will give Charlie some practice using scissors. Then we’ll get a Christmas tree which will be our decorating splurge because, whether we go real or artificial, it’s certainly going to put us back more than a few dollars.

What are you doing this year to decorate for the holidays? Do you go all out or are you more of a less is more decorator?

Read Full Post »

Not so very long ago I wrote about how I was forcing paperwhite narcissus bulbs in order to have them bloom in time for Christmas. Christmas has come early because they’re starting to bloom now.

These bulbs took just under three weeks to start blooming, so I figure that if I start the process of forcing new bulbs now they’ll bloom right at Christmas.

In my first post about paperwhites, I wrote about how researchers at Cornell University discovered that giving paperwhites a small amount of alcohol stunts their growth, thus avoiding some of the problems of blooming paperwhites being top heavy and falling over. Despite the lesson in alcohol-induced stunting, I decided to keep my first round of paperwhites completely sober. Sure enough, these just-blooming paperwhites are about to topple over. But I figured out a way to potentially avoid this problem in my second round of paperwhites without stunting the bulbs’ growth. I just put my new paperwhite bulbs in the bottom of tall, clear glasses. As the bulbs grow, I figure the sides of the glass will keep them propped up. It’s worth a try at any rate.

Do you have any bulbs growing? Paperwhites, amaryllis, or something else?

Read Full Post »

I set a goal for this past weekend to paint the porch ceiling blue. Technically, the goal was to paint the ceiling the previous weekend, but after a small setback in which I chose a shade of blue (Serene Sky by Behr) that was all wrong for the house, I had to postpone my efforts until this past weekend. Actually, if I’m going to be completely honest, I really set the goal to paint the porch ceiling blue many weeks ago when I the made The List — 20 tasks to do around the house, each costing less than $20. But when I created The List, I didn’t put a date on any of the “to do” items, so I really wasn’t behind on the porch ceiling project until last weekend.

Armed with a quart of Cloudy Day by Behr, I set to work Saturday morning. I applied blue painter’s tape around the edges of the porch where the ceiling meets the molding. Then I took a brush and cut in around the painter’s tape. After that was done, I used a roller brush to roll the paint onto the ceiling. I got about three quarters of the first coat done when I ran out of paint. So in the middle of my project, Mark, Charlie and I drove to Home Depot to get more paint. Running out of paint was particularly distressing because I’d hoped to paint the porch ceiling for under $20 and I’d already gone over budget after wasting money on the quart of the way-too-cheery Serene Sky. This, people, is why they make testers of paint. I could have bought one for Serene Sky, in fact, I thought about buying one but I decided not to because I didn’t want to spend the $3 or whatever relatively small amount it cost. Silly, silly me.

Anyhow, off we went to buy more Cloudy Day. I knew I could finish the ceiling with two more quarts, but the price of two quarts was only a couple of dollars less than a gallon, and Mark said he liked the color of Cloudy Day so much that he might want to use it on other projects, so a gallon of the stuff came home with us.

I finished painting the first coat of Cloudy Day and got to work on the second coat. That’s when Mark couldn’t stand it anymore and took over. Mark used to be a professional house painter. He’s very, very particular about painting. The fact that Mark hadn’t shown much interest in the porch ceiling project until he ultimately took it over was a little, uh, odd to me. At some point in the middle of the first coat, when he came out and started giving me unsolicited advice, I asked him why he wasn’t insisting on painting the ceiling himself. He replied, “I’m trying to learn to let go.” Alrighty then, I kept painting. I don’t think I’m a bad painter, but I will never be as good a painter as Mark. So by the time I got around to rolling on the second coat of paint, Mark  had watched my efforts for long enough. He finished up the porch ceiling while I played with Charlie and tried not to interfere too much.

While I’m happy with the ceiling, I’m not happy that I went over the $20 budget. In fact, you may be wondering just how far over budget I went.

The Tally
(All paint by Behr in satin finish, exterior paint & primer in one)

  • 1 quart Serene Sky: $15.95
  • 1 quart Cloudy Day: $15.95
  • 1 gallon Cloudy Day (by the time I got to buying a gallon of Cloudy Day, I wanted to have it mixed using a cheaper Behr exterior paint in order to save money, but Mark told me that was a bad idea. I don’t know why it was a bad idea, but I didn’t really feel like I was in a position to argue): $34.95
  • 1 roller brush: $4.97
  • paint brush: FREE (thank goodness, we had it already)

Grand Total: $71.82

Hmm, not even close to $20. So how did I go so terribly wrong? First, I should have sprung for the tester in Serene Sky rather than buying the quart outright. Second, once I had settled on a color — Cloudy Day — I should have just bought a gallon rather than hoping that a quart would be enough. To my credit, however, I did use a paint calculator tool which estimated that I only needed about a quart. Granted, I knew my measurements probably weren’t exact since the calculator is based on painting four walls rather than a ceiling, but I figured I was close enough. Third, I didn’t choose an inexpensive paint. Behr offers a basic exterior paint that would have saved me several dollars, but I bought the paint that has the primer built in thinking it would save me a step. Maybe it did, but maybe I also could have just used the less expensive exterior paint and not bothered priming. I’ll never know. Finally, I bought the small roller brush (and I used it for this project), but we had two larger roller brushes at home I could have used instead. Had I just bought a couple of tester jars (one for Serene Sky and one for Cloudy Day), and had I bought a gallon of Cloudy Day to begin with, and had I properly checked our supplies at home before I went to Home Depot, my total costs would have probably been about $40, still much more than the $20 I’d hoped for, but a lot less than what I did spend.

Regardless of how I annihilated the budget, the ceiling looks great. The blue is subtle yet unexpected and fun. Unfortunately, however, when Mark finished the second coat and removed the carefully placed painter’s tape — the tape that was supposed to prevent me from getting blue paint on the cream colored molding — there were several spots where the blue paint had seeped through the painter’s tape, like here:

and here:

I probably wouldn’t have noticed this, but Mark sure did and that’s all it took for him to announce, “We’re going to have to repaint the whole porch.” To be fair, the porch needed to be repainted even before my ceiling mishaps, but the mishaps have provided a sense of urgency that Mark hadn’t felt before. So I guess repainting the porch will be the next project at Casa Yikes Money. I’ve already started looking at different shades of tan. But this time, I’m investing in some tester jars.

Read Full Post »
What’s in a name?

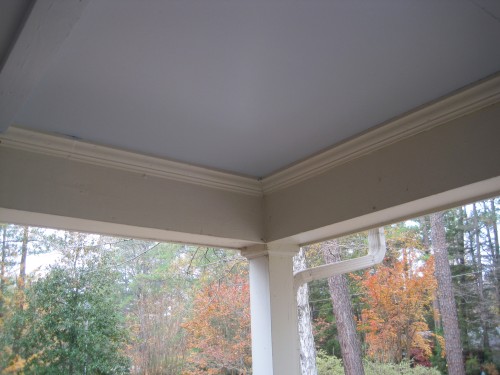
This past weekend I pledged to tackle one of the tasks on my daunting To Do list. I’ve been meaning to paint the porch ceiling blue for quite some time. Blue porch ceilings are a bit of a Southern tradition that reportedly comes with benefits – they’re said to keep wasps and spiders from taking up residence in the corners of the porch (which would be awfully nice given the wildlife that seems to be attracted to our porch) and blue porch ceilings are also said to keep away evil spirits. I don’t know how much time I spend worrying about evil spirits, but if a blue porch ceiling keeps them away, then I suppose that’s an added bonus. (This is totally off topic, but not long after we moved into our house one of our neighbors asked us how we were settling in and then asked if the house was haunted. Say what?! I replied no and then asked why she had asked. She said, “No reason.” Uh, yeah, right. I’m still trying to find out what she knows about this house that we don’t.) Anyhow, the porch. I decided to paint it blue simply because I thought it would be fun and different.

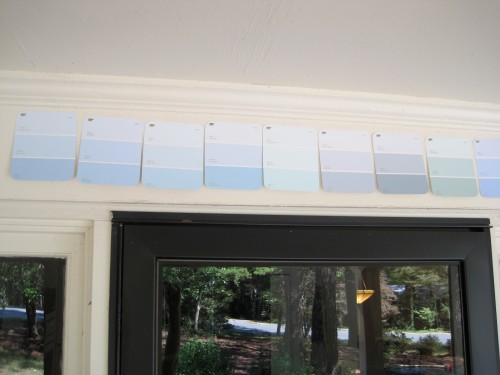
I did a lot of online research trying to find recommendations for exactly which blue paint to use. I was hoping to see pictures of blue porch ceilings with accompanying notes like, “The ceiling is painted in Sherwin Williams’ Ice Blue.” Or, “I painted my porch ceiling in Olympic’s Lotsa Blue and it is stunning.” Or ideally something like, “Never use anything but Benjamin Moore’s Blue Porch Ceiling for your porch.” Unfortunately, I couldn’t find any guidance so I was pretty much on my own. As I mentioned in Friday’s post, to help me decide on a color, I gathered a heck of a lot of Behr paint chips and taped them up on the porch near the ceiling.

Lined up in this way, I quickly eliminated colors that looked too light or too dark. I also eliminated ones that looked too green or too gray. Mark’s input on the subject was that he really didn’t want a blue that “looked like the bottom of a pool.” Hmm, that would eliminate most of the paint options. Ultimately, I settled on this color called Serene Sky:

I’d really like to say that I wasn’t heavily influenced by the name of the paint, but I was. I mean, come on, who wouldn’t want their blue porch ceiling to appear like a serene sky?

So off I went to Home Depot to get a quart of Serene Sky in exterior paint (with primer built-in) in satin finish. Several weeks passed, and I decided that this weekend would offer the fantastic weather to paint the porch ceiling. We had a glorious weekend, perfect for outdoor projects.

On Saturday morning, I gave the entire ceiling a good scrubbing with a sponge dipped in warm soapy water. I let it dry for several hours. Then I put up some painter’s tape around the edges of the porch and broke out the paint and paintbrush. It didn’t take me more than a few brushes of the paint to know I didn’t like the color. I asked Mark for his opinion and he was equally unenthusiastic about it. We decided to paint a big chunk of the ceiling in two coats of the Serene Sky just to give it a good chance to grow on us. But it was obvious that Serene Sky was just a bit too, well, cheery for us. I’m not sure how to describe it other than too cheery. It’s not that it was a bad color, it’s just that it looked completely out of place on our house.

So we gathered all the other paint chips I’d collected and sorted through them again. This time, we were drawn to the grayer blues since Serene Sky had taught us that we’re not really cheery blue people (and our house turns out not to be cheery either). We narrowed it down to two alternatives: Cool Sky and, good grief, a color called Cloudy Day.

Cool Sky was nice, but it seemed pretty darn close to Serene Sky. Over and over, our eyes kept being drawn to Cloudy Day. But could we really trade Serene Sky for Cloudy Day? Really? I am endeavoring to reform my pessimistic tendencies, but choosing Cloudy Day over Serene Sky just seemed like throwing in the towel.

In the end, I just had to admit that I’m more a Cloudy Day kinda gal than I am Serene Sky. So yesterday morning we headed back to Home Depot and bought a quart of Cloudy Day. Holding my breath, I painted a big block of Cloudy Day on the porch ceiling right next to the Serene Sky block to see how we liked it. The result: it was so much better (although I fully realize that the picture below doesn’t do justice to the incessant cheeriness of Serene Sky versus the subtle warmth of Cloudy Day).

But by the time I had painted just the test block of Cloudy Day, most of the afternoon was shot so I still haven’t finished painting the front porch ceiling. While I’d like to finish painting as soon as possible because it really looks awful at the moment with two big blotches of blue (and one of them is the way too cheery Serene Sky), I am not sure when I’ll be able to get to it. Hopefully next weekend’s weather will be as nice as this weekend’s, filled with a serene sky and not a glimpse of a cloudy day. Oh, wait.

*Photo of Serene Sky paint chip taken from Home Depot’s website, found here.

Read Full Post »

If you’ve been reading this blog awhile, you’ll remember that long ago I had a great idea to redo a set of four dining room chairs our neighbors gave us. If you’re new to this blog, you may not yet have realized that two of my worst qualities are that I procrastinate and I’m indecisive. This project to redo the dining chairs suffered from both.

To catch you up, at the end of May(!) I took one of these dining chairs:

and painted it a creamy white and recovered the seat cushion.

While I liked the result a lot more than I did the original chair, I didn’t love it enough to justify doing the other three chairs exactly the same way. So then I thought I might like a pale green chair, so I repainted it:

But I really didn’t like that.

So then I painted it black, the color that Mark wanted from the beginning of this project.

And I liked it and decided that all four chairs should be black. But then I looked around and realized that meant I had to sand, prime, and apply two coats of paint to THREE other chairs. And that’s when I decided that I’d rather do just about anything else.

But several weeks ago I made a list of 20 projects I’ve been meaning to do around the house. Completing the dining room chair project was on the list and seemed to be a combination of fairly easy and fairly urgent – I was tired of looking at those mismatched chairs taking up space in my dining room.

So here you have it, four “new” dining chairs to place at Mark’s homemade dining table.

While I think the chairs and table in the photo above look great, I would be remiss if I let you believe that’s how our dining room always looks. In fact, this is how it looks usually:

Yes, our dining room is used a heck of a lot more for ping-pong than for dining. Charlie discovered ping-pong over a year ago and loves it.

Though this project from start to finish took me quite a long time, it was blissfully inexpensive.

The tally:

  • four dining chairs: free from neighbor
  • sandpaper: free (already had some)
  • primer: free (already had some)
  • paint brushes: free (I used our standard go-to paint brush for most of each chair and then for the intricate bits, I used one of Charlie’s paint brushes which was the perfect size)
  • 1 yard of fabric for the seat cushions: $5 (bought at a charity benefit, so I can even deduct it on my taxes!)
  • paint: $12 (the only paint I bought was a quart of black paint and in the end I didn’t even open it because the black paint we already had turned out to be enough)
  • replacement bolt: $1.55
  • replacement screws: $1.95 (I lost several of the original screws that hold the seat cushions to the chairs — they’ll turn up someday at which point I’ll wonder what the heck they’re for)

Grand total: $20.50

Mark even brought over our neighbor (the original owner of the chairs) to see if she approved of the redo. Mercifully, she did. She even called me Martha Stewart. I chose not to be insulted.

Read Full Post »

My house is filled with someday-I’ll-get-to-it tasks that I manage to put off for an incredible amount of time. Many of the tasks aren’t even difficult or time consuming. In early spring I bought a new shower curtain for our bathroom. It was an impulse purchase — I’d never much liked the shower curtain we had and this new one was on sale at a charity benefit for just $5.

I thought I’d hang the new curtain right away, but after I got home I looked at our vinyl shower curtain liner, noted that it needed a good scrubbing, and thought that I shouldn’t bother replacing the cloth shower curtain until I was ready to clean the liner. And then days turned into weeks and weeks into months. No new shower curtain, and even more disgusting liner. The liner had lots of soap scum and some mold. Yuckity, yuck, yuck.

Here’s the old shower curtain; it’s not bad, it’s just nothing that in any way endeavors to enhance our tiny, blah bathroom:

I took advantage of this past holiday weekend and decided to tackle a couple of someday-I’ll-get-to-it projects. The shower curtain and liner were at the top of the list.

I removed the old cloth curtain and liner and brought the liner outside to lay flat to clean. I hosed it down and went to work scrubbing it with a sponge and some distilled white vinegar that I put in a spray bottle. I’ve been trying to use less toxic cleaners in our house, so as I finish bottles of chemical cleansers, I replace them with milder options. There was a time I would have cleaned our shower curtain liner with diluted bleach, but we ran out of bleach many months ago. The vinegar works very well on mold and soap scum and I don’t have to hold my breath while using it.

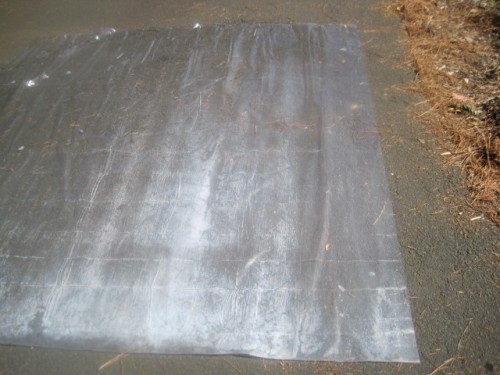
The only problem with laying the curtain on the driveway to clean was that I couldn’t easily see the mold. So I moved the whole operation to our laundry line.

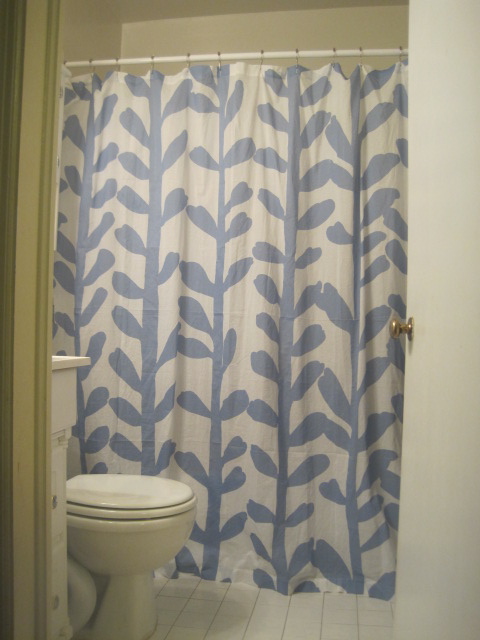
The vinegar worked like a charm. To remove any remaining yuckity yuck bits, I tossed the liner, a couple of small towels, and some detergent in cold water in the washing machine (I’d read that the towels work to scrub the shower curtain). When the wash cycle was finished, I hung the liner to dry outside. Half an hour later, it was ready for the bathroom, and of course, so was the five month old cloth shower curtain:

It’s amazing how much less blah the new curtain makes our bathroom (and me) feel. Now, if only the new curtain will inspire me to tackle more of my endless list of small projects around the house….

Read Full Post »

Older Posts »